
You may have distinct subgroups in your community that you want to invite for different types of research activities. A great way to track them is tagging them for easy filtering and reference. Each member can have more than one Tag. If you have old and new segmentation, or look at members based on, for example, industry and profession separately, Tags will work great.
You have two options to tag people:
- Tag individual members, one at a time
- Tag a group of members
For both options, filter for your users in the User Tab. For details on filtering, read here.
For tagging steps, continue reading here:
- After you have filtered for the right segment of users, click on the tag icon.
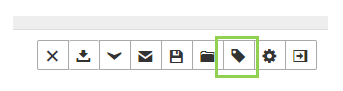
- A window will pop-up allowing you to specify a tag. The number of users to be tagged is shown. Here you are able to add or remove tags for the entire group of members.
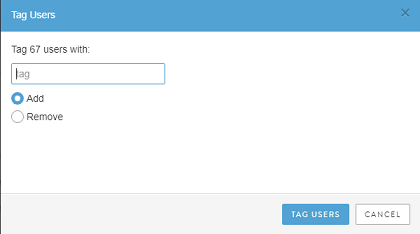
- In the space, type in the TAG/ description you like to use for your filtered members. If a tag already exists with the same or similar name the text field will start populating. This helps to prevent you creating multiple tags for the same segment with slightly different descriptions.
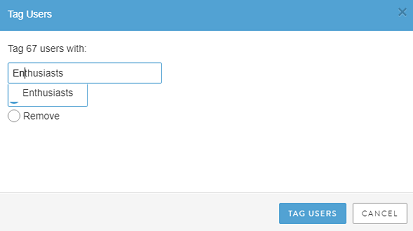
- When done, click the Tag Users button to apply the tag.
- To remove tags, follow the same steps. Filter your members, click the tags button, write in the Tag that you would like to remove in the Text box, and select "Remove" instead of "Add". Save you changes by clicking the Tag Users button on the bottom of the dialog.
Comments
0 comments
Article is closed for comments.