
For the live session, be sure to log-in about 10-15 minutes prior to the official scheduled time – occasionally a member will log-in to the session early and you need to make sure the members feel settled in and do not leave.
Have your first question include a "Welcome Message" to help members get comfortable. Members can start introducing themselves and get familiar with the features of the chat.
Be sure to mark the first question as an “Open Essay” and NOT a notification. Members will NOT be able to provide comments/use the chat box at the bottom of the screen (Notifications only provide information – no interaction or actual “chatting” will take place since the “chat field” is closed).
We recommend having two moderators present - Moderator A who moderates the members and handles publishing/navigating the questions, and Moderator B for communicating with the backroom clients/stakeholders and relaying that information back to Moderator A. If you are handling a small group of members (N=5 or fewer) and only 1-2 stakeholders, an experienced community manager can handle a chat solo, but as best practice 2 moderators help account for any potential missteps and maintains a high quality, smooth-running session.
- In some cases, the moderators are in different locations (e.g., live chat sessions during non-business hours). One tip is to have an open phone line between the moderators, so they can easily verbally communicate backroom client updates and streamline the overall management of the live chat session.
Moderation – Publishing and Navigating Questions
- Go to the Results tab and click on “View Active Session” to access the live chat session.
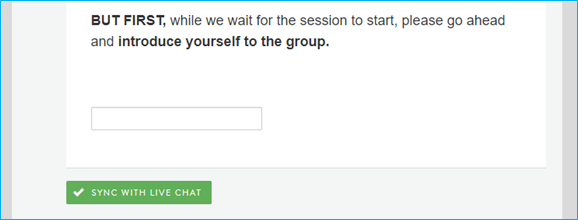
- On the left-hand side will be your set of pre-programmed questions. If for some reason some questions are missing from the left-hand side, you will need to sync these questions. To do so, go back to the Question Editor page and validate all questions by selecting “Sync With Live Chat.” Once complete questions will now be shown in the left-hand side of the live chat window. See below for an example:
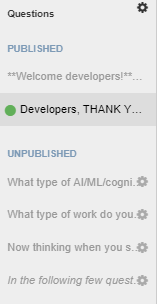
- Questions will be separated by 2 categories: published and unpublished questions.
- All of your programmed questions will be under one of these two sections. Published means you have asked the questions and have garnered responses, and unpublished means you have not. See below for an example:
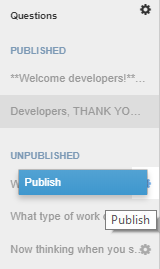
- When you are ready to publish the question, click the gear icon wheel next to the question. When you click that you will have the option to publish the question. This will allows users to see and respond to the question. See below for an example:
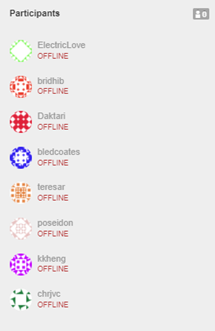
- The list of participants will appear on the right-hand side of the live chat session window.
Moderation – Follow the Green Dot
- Once you have a question that is published, it will remain open until you publish a new question. You will see a “green dot” next to the question that is currently published and collecting responses. Note that only 1 question can be seen and be answered at any given time. See below for an example:
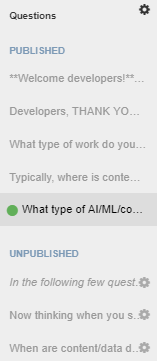
- If you need to republish a question and allow responses after a new question has been published, simply click the cog wheel to that question and a box will open up. Easy!
- If you want to ask a new question, you can simply go to the bottom left and there is a box named "New Question". Here you can add ONLY open-ended questions, NOT close-ended (e.g., single select, rating, multi select).
- To add close-ended questions, go back to the Question Editor and program the new question and click on "Sync With Live Chat."
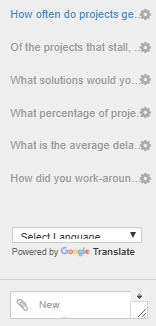
- When you are done the new question will appear in your unpublished questions. When you are ready to chat it, just publish it!
- Adding new questions during the chat as shown above is very helpful for the transcripts/results – while you can easily post a new question through the chat window/field, posting a new question via the left-hand side will structure the transcripts/results such that the data will be shown separately. You won’t have to take time to tediously find when and where you posted the question within the broader discussion!
Client Observers in the Backroom
- In some cases, you will need to include clients/stakeholders as "observers" for the live chat session, including stakeholders who do not have a community account. These contacts will need (1) a backroom link to access the live chat session and (2) a password.
- To generate the link, simply go the Results tab of the live chat activity, right click on “Open Back Room” and “Open link in new tab”. From there you can copy the link to be included in the email invitations you send via your off platform email system to the client stakeholders who will view the live chat event.

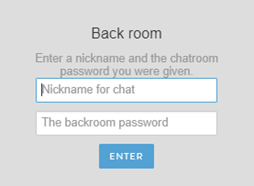
- Backroom members will need to input the password found next to the "Open Back Room" icon. To log in, clients click on the link, input a "Nickname" which is visible to all other backroom members and the moderators and the password.
- Backroom members CANNOT:
- Actively moderate a live chat session
- Publish/unpublish questions
- View unpublished questions
- Comment/chat with members
- Backroom members CAN:
- View and discuss the backroom chat window/thread
- View the live chat session as an observer
- Relay comments/provide feedback to the moderators through the backroom chat window
Comments
0 comments
Article is closed for comments.