
Update the Activity Settings to get your activity ready for fielding.
Go to the SETTINGS.
Update the following areas, if desired:
WHO IS TAKING THE SURVEY
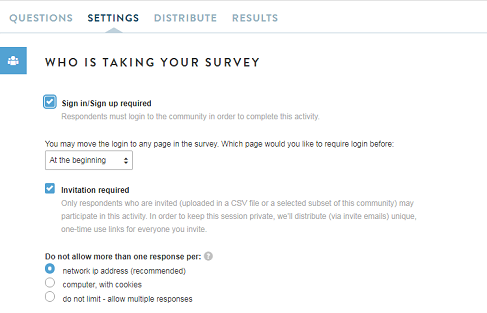
The default settings are usually what you want for your focus group: Sign in/ sign up and invitation required. Update the settings if you wish to open the activity up to non-members and/or don't require an individual invite to participate.
Select the activity page from the dropdown if you would like to force members to sign in after answering one or multiple questions first. Typically, you want members to sign in first, but for recruiting or public communities, a different activity page to sign in may be appropriate.
- Network ip address (recommended): this keeps multiple members who are accessing a focus group through the same network ip address from completing. This is the recommended setting; however, if you are inviting a lot of people within the same ip network (e.g., same company location), you should consider a different setting
- Computer, with cookies: this limits completion of this focus group to one per computer. If you have multiple members in the same household who share a computer, only one of these members would be able to complete this focus group.
- Do not limit - allow multiple responses: has the least restrictions in terms of which members can complete a focus group. This setting allows for multiple members within the same ip address to complete a focus group.
ASSOCIATE SURVEY WITH A PROJECT
You are able to associate a focus group with a project. This is a useful feature for your clients or internal stakeholders and helps them navigate their research studies in the customer boardroom. For more information on use in the customer boardroom, read here.
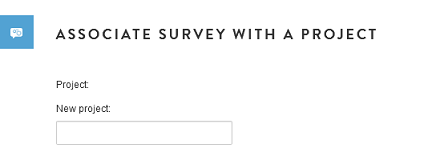
- To associate the focus group with a project, type in the New project in the text box and save the settings screen (bottom of the page).
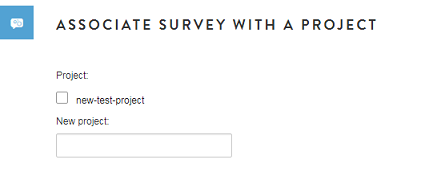
- After saving your page, scroll back to the "Associate survey with a project" section and check the project that now appears.
- After the initial creation of the project, it will appear in all activities (new and existing activities). It allows you to associate or remove multiple activities at any time to projects.
TAGS
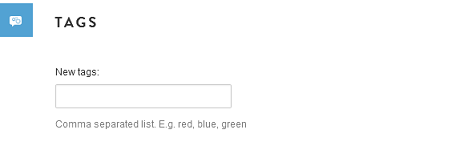
You are able to assign one or multiple tags to each focus group. This is another tool to make activities easier to find and organize for your clients or internal stakeholders. It is designed to help them navigate their research studies in the customer boardroom. These tags are not respondent-level tags but activity level-tags. For more information on use in the customer boardroom, read here.
- To create tags, simply type one or multiple words in the text box. Separate each tag using a comma.
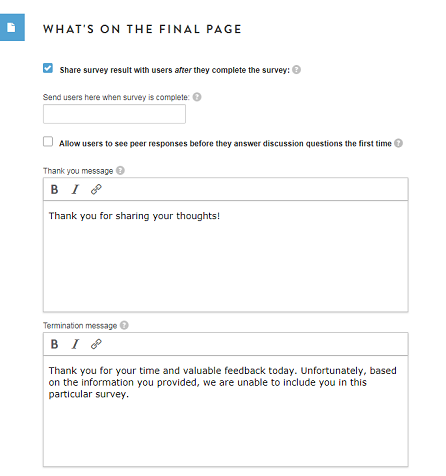
WHAT'S ON THE FINAL PAGE
The default settings are usually what you want for your focus group, but you may want to update settings if desired.
- The first checkbox is needed to ensure discussion and moderation is possible after members complete all questions. Keep this checked.
- By default, after completing an activity, members are sent to the community homepage. You can enter a different URL in case you want them to be send to a different site.
- The second checkbox is unchecked by default. Typically, you want to get each respondent's answers to each question first before them seeing others' responses.
- Update Thank you and Termination messages if you want to communicate activity specific information.
CLOSING YOUR SURVEY
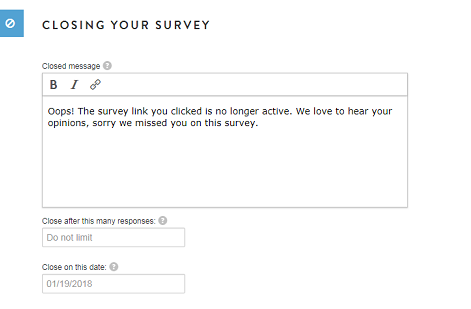
You may update the Closed message. This is the message members will see if they try to complete the activity after you have closed it for data analysis.
You have the option to close the activity automatically by setting a number of responses and/or a closing date. If you choose the "close on this date" option, the focus group will close within 1 hour of Midnight CST on the date you select.
INCENTIVES
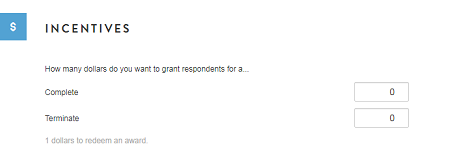
Lastly, set your incentives for the activity. Type in how much you would like to grant members for completing or terminating the activity. Please note that if you do not wish to grant incentives, you will still have to populate these boxes with “0.”
Always do this before activating and sending invites. If you add incentives or update the incentive amount after the activity started fielding, incentive amounts will not update automatically for respondents. Contact your account manager if this happens to you.
SAVE
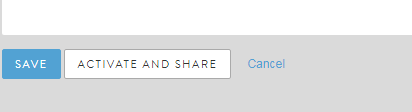
When you are done, Save your changes.
You can also Activate and share your focus group from here using the ACTIVATE AND SHARE button. It will take you to the Distribute Tab where you design your invite and reminder text and select members to invite.
You can also cancel all changes you have made.
Continue reading:
Comments
0 comments
Article is closed for comments.